

Day 3 — Install Phlox and add the plugins you need
Today we will replace the starter theme with the main theme Phlox, tidy up the default WordPress clutter, and install the key plugins. This is a practical, no-nonsense day: do the steps in order and don’t skip the cleanup — it prevents conflicts and keeps your site lean.
1) Why switch to Phlox?
Phlox is a lightweight, flexible WordPress theme with good compatibility for page builders (Elementor) and demo imports. It’s an excellent choice for a simple SaaS landing page because it gives you attractive starter layouts and lets you move fast without wrestling with code.
As you understand, I’m sharing my journey to launching this SaaS, and you too can follow along step by step to achieve success. I’m not imparting any complex technical knowledge or overwhelming you with difficult tasks. You take it step by step, effortlessly, every day, or however you prefer, constantly returning to the steps if you’re unclear. This way, you achieve your goal gradually and confidently.
Phlox itself is a framework or main theme on which we’ll install a secondary or child theme. In other words, we have an engine and a template that sits on top of it. In any case, you’ll understand everything during installation.
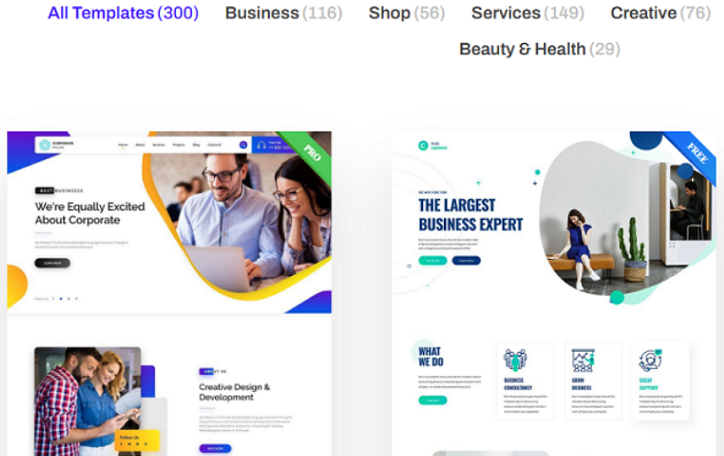
Below you can see examples of different child themes from which we will choose one for our SaaS project.
2) Clean up the default WordPress install (do this first)
Before installing Phlox, remove any leftover themes, plugins and example content that Hostinger auto-installed. This avoids plugin and style conflicts.
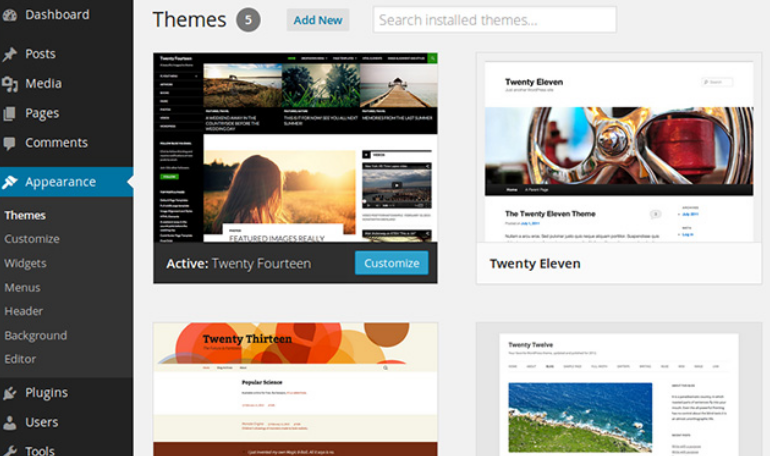
1. Log into WordPress Admin → Appearance → Themes.
○ Delete all themes except the one currently active. (If you need to switch first, activate a default theme like Twenty Twenty-Three, then delete the other themes.)
2. Go to Plugins → Installed Plugins.
○ Deactivate then Delete all plugins. (We’ll install specific plugins shortly)
3. Remove sample pages and posts:
○ Pages → All Pages → delete “Sample Page” and any demo pages.
○ Posts → All Posts → delete any demo posts.
4. Set pretty permalinks: Settings → Permalinks → choose Post name and click Save Changes.
○ This makes your URLs clean and SEO-friendly
Do these cleanup steps exactly now — it saves headaches later.
3) Install and activate Phlox
With the install cleaned, add the Phlox theme.
1. Appearance → Themes → Add New and search for Phlox (or upload the Phlox zip if
you bought a premium package).
2. Click Install → then Activate.
3. After activation, Phlox may prompt you to install required addons — follow prompts
4) Install the required plugins
Phlox normally needs a few companion plugins; make sure these are present and active:
● Elementor (page builder) will be installed together with the Phlox theme.
● Phlox Core Elements — will be also installed together with the Phlox theme.
● Depicter — install & activate (for image galleries / sliders if you plan to use them).
● Contact Form 7 — install & activate (simple, reliable contact / signup forms).
How to install a plugin:
● Plugins → Add New → search for the plugin name → Install Now → Activate.
● Verify: After installing, go to Plugins → Installed Plugins and confirm Elementor, Phlox Core Elements, Depicter, and Contact Form 7 are active.
5) Import a free Phlox demo / child theme
Phlox includes demo/child themes you can import to get a ready page layout.
1. In the admin bar, open Phlox → Dashboard (or Appearance → Phlox Options depending on version).
2. Find Demo Importer or Starter Sites.
3. Browse the available demos and choose a free demo that matches an app / landing page style (look for “App”, “Startup”, or “Product” demos).
4. Click Import. The importer will add pages, widgets, and demo content — this gives you a structured starting site.
○ During import you may be offered to keep a watermark or demo images. You can keep them for now — you’ll replace visuals with your own images later, so don’t worry about watermarks at this early stage.
5. After import, visit your site’s front end and confirm the layout imported correctly. Sometimes it takes a little while for everything to appear. About 10 minutes after installation, refresh the web page again. Usually, everything should be visible perfectly.
6) Quick checks after import
● Navigate the front page, pricing, about and contact pages — ensure no fatal errors.
● If something looks off, re-run the demo import or check plugin activation.
● If you see a “Watermark” on images, it’s fine for now — plan to upload your own visuals before launch.
What you’ve achieved on Day 3
 Cleaned the WordPress install of demo clutter.
Installed and activated the Phlox theme.
Installed required plugins: Elementor, Phlox Core Elements, Depicter, Contact Form 7.
Imported a free Phlox demo (child theme) as your base layout.
You’re now sitting on a clean, flexible site built for fast iterations — perfect for testing messaging, collecting early interest, and validating your product hypothesis quickly.
“You’re on your own path, and if you miss something or don’t understand it, you can go back and see how to do it all again. You don’t need any code, and I’ll continue to provide you with detailed, ready-made solutions. All you need to do is read my step-by-step instructions, follow them, and achieve success. If you still feel like this is too much information, take a couple of days off and then resume studying the material on launching your first SaaS. Everything needs to be done in a way that’s comfortable for you.” ( Founder: Vitaliy / nocody.pro )
In lessons 4–33, you’ll move beyond theory and start building real momentum.
You’ll create your own no-code SaaS in just a few days, launch it, and attract your first 10–50 users without spending a dollar on ads. Every step is designed to deliver a clear mini-win that you can see and measure daily. By consistently stacking these wins, you’ll move fast, stay motivated, and confidently reach the finish line with a product that actually works.
If you want to keep moving forward with lessons 4–33, follow the link below to see a concise overview of everything waiting for you inside.
Here’s the link: https://nocody.pro/no-code-micro-saas-launch/